You can add a border to most items. (If you can’t add a border, the Border button is not available for the selected item.)
1 Select the item.
2 On the Home or the Insert and Modify tab, in the Items Style section, click the Border button.
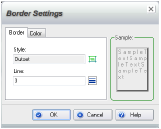
3 In the Border Settings dialog box, on the Border tab, click the Border Style button and specify the type of border. To remove a border, specify None.
Note: You can also specify a style, such as Dotted or Dashed in the Border Thickness list.
4 To change the thickness of a border, type a value (in points) in the Line box or click the Border Thickness button and specify a thickness.
5 To color the border, click the Color tab. Select a pre-defined color, type a hexadecimal color, or click the Full color palette button to specify a color in the Color palette.
6 Click OK.
You can use the Border Settings dialog box to change a border.
In addition, for a text item, you can adjust padding in the Border Settings dialog box. See “Editing and Formatting Text” for details.