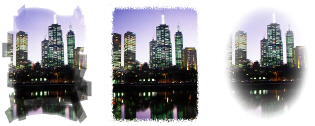
Stencils are an effective way to apply borders or ‘wash’ effects to images. You can hide part of an image, fade out parts, place the image inside a cutout shape or border, or apply a texture or a colored wash to the image.
1 Select the image to select it.
2 On the Insert and Modify tab, in the Modify section, click Image > Add/Replace Stencil.
3 In the Choose Image dialog box, which opens to the Stencils folder, double-click a folder to browse for a stencil.
4 When you find the stencil to use, select it.
5 Click Open.
You use the same procedure to replace a stencil.
You can also add a stencil by clicking Stencils on the Media Gallery toolbar and then opening the various folders. When you find a stencil you like drag it on top of a selected image.
After applying a stencil, you can remove it.
1 Select the image with the stencil.
2 On the Insert and Modify tab, in the Modify section, click Image > Clear Stencil.