Cropping an image means trimming unwanted areas. For example, if an image is imperfectly centered, you can crop the extra background so that the subject is at the center of the image.
Cropping in WebEasy does not affect the original image; therefore, you can easily restore the image.
1 Select the image to crop.
2 On the Insert and Modify tab, in the Modify section, click Image > Crop Image.
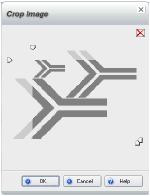
3 In the Crop Image dialog box, drag the handles at the corners of the image as needed to enclose the area to keep.
WebEasy removes anything in the shaded area.
4 Click OK.
You can cancel a crop by opening the Crop Image dialog box and clicking the x in the dialog box.
1 Select the image.
2 Move the pointer over a handle.
3 Press the Ctrl key and with the Crop pointer drag the handle.