You can use Publish Assistant to publish your website to the Internet.
Note: If you signed up for the WebEasy hosting service, the easiest way to upload your files is to use the WebEasy Hosting Services Publishing wizard.
1 On the Publish tab in the 3rd Party Hosting section, click Publish.
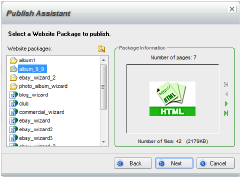
2 In the Publish Assistant wizard, click Next.
3 On the left, select the website folder (created when you clicked Build) to upload.
4 If the folder to upload doesn’t appear in the Website packages list, click the Browse button. Locate the package and click Open.
5 Review the included files shown on the right by clicking the navigation buttons.
6 Click Next and, if you have an active Internet connection, click Connect.
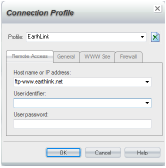
7 In the Connection Profile dialog box, select the profile for your website space.
The Profile list includes standard profiles for many popular ISPs.
If your ISP isn’t in the list, create a profile for your hosting service. See “Creating Connection Profiles” for details.
8 If you selected a standard profile, fill in the information for connecting to your account.
9 Click OK.
10 After the connection is established (which may take a few minutes), to transfer the files, click Next.
11 To remove any old files, select the Cleaning the selected website check box.
When selected, if WebEasy finds any files at the remote site that are not required for the current package, it deletes them.
If you have subfolders for this site, keep this check box clear so the subfolders are not deleted.
12 Click Next.
13 If you wish, select the check box(es) to view the website or to view a report.
14 Click Finish.
If you asked to view a report, it appears in your default browser. If you asked to view both the report and the website, the report appears first and then the website appears. To return to the report, click the browser’s Back arrow.
See Also
Using the WebEasy Hosting Service
Using Another Web Hosting Service