You can publish your website with space provided by the WebEasy hosting service. You can do this by using the WebEasy Hosting Services Publishing wizard.
Note: If you don’t have an account yet from the WebEasy hosting service, click Sign-Up on the Publish tab to get an account. If you wish, you can take advantage of a free trial period.
You can open an account with the WebEasy hosting service to publish your website to space allocated with the account.
1 On the Publish tab in the WebEasy Hosting section, click Sign-Up.
2 In the browser window, specify that you want to open a new account.
3 Follow the online instructions.
Once you have a WebEasy hosting account, you can publish a new site or update an existing website in your space with the WebEasy Hosting Services Publishing wizard.
Note: If you have questions when going through the wizard, click the Questions? Get help now link to get information online.
1 Make sure you save your WebEasy document and build it into a website. (For details on building the site, see “Building Your Website”.)
2 On the Publish tab in the WebEasy Hosting section, click Publish. (You can also choose Start>All Programs>Web Easy Professional 10>Web Easy Site Publisher.)Variables not used because the titles are not WebEasy.
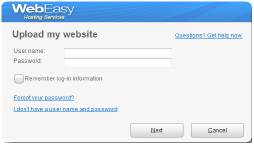
3 In the WebEasy Hosting Services Publishing wizard, if necessary, type the User name and Password for your WebEasy hosting account and click Next.
Note: The first time you sign in, you must type your User name and Password. If you select Remember log-in information, the wizard automatically fills in the information the next time you open the wizard. If you forgot your password, click Forgot your password? to retrieve your password. If you don’t have an account yet, click I don’t have a user name and password to open a new account.
4 Select the website to upload. (Make sure there’s a green check mark in the correct check box.)
If the correct website does not appear in the list, click Browse Folder to locate and select the folder with the website’s files, and then click Select Folder.
Note: You can only upload one site at a time.
5 Click Next.
6 Select the domain for this website. (You can upload to more than one domain by pressing Ctrl as you select each one or press Shift for adjacent domains in the list.)
Note: To buy another domain for your account, click the Buy a Domain link.
7 Click Next.
8 After the files have been uploaded successfully, if you wish, click the site’s link to verify the website. (If you selected multiple domains, the wizard has links to each.)
9 To close the wizard, click Finish.
Note: You may need to reload the page in the browser or clear the browser’s cache to see the updated pages.
You can manage your WebEasy hosting account online.
1 On the Publish tab in the WebEasy Hosting section, click My Account.
2 In the browser, type your user name and your password.
3 Click Login.
4 Make any needed account changes.
5 Log out.
Note: You can also access your account by clicking Manage my account at the end of the WebEasy Hosting Services Publishing wizard.
You can use Publish Assistant to publish your website.
Note: If you signed up for the WebEasy hosting service, the easiest way to upload your files is to use the WebEasy Hosting Services Publishing wizard.
For details about uploading files with the Publish Assistant, see “Using Another Web Hosting Service”.
As an alternative to the WebEasy Hosting Services Publishing wizard, advanced users can publish websites by using FTP Max, an easy-to-use FTP utility. With it you can transfer files to and from your remote server and manage your remote files.
For details about uploading files with FTP Max, see “Publishing with FTP Max” and FTP Max Help.
See Also